Webcams are video cameras that attach to the top of your computer and stream video to apps. However, do not be alarmed, as the apps require your permission to utilize your webcam. In this guide, we will talk about how to configure Webcam settings on either a Windows PC or a Macbook.
These days living life without a webcam is out of the question. Ever since the dawn of COVID-19, everything has been online. A webcam helps you confirm your presence or show your work in a meeting or a class. Apart from that, if you want to be a content creator or streamer, then a webcam is a must as it helps you show your face to the audience.
Webcams are now available very cheap. Now cheap doesn’t particularly mean good. Sure the webcam may say that it is 720p or 1080p, but that is just the quality of the video. Many webcams come out of the box with lousy exposure, brightness, contrast, etc. Although some may have auto-configured, you might want custom settings. Luckily for you, I know just the thing.
How to configure a Webcam (Company software)
If you bought your webcam from a good brand such as Logitech, consider yourself lucky as it is one of the few webcam producers that includes software for most of their webcams. However, you may find some trouble with some old webcams.
How to configure a Webcam (Not supported by the software)
Yes, most of us have old and rusty webcams, but that doesn’t mean you do not have a chance though. As there is another way to configure your webcam settings. This will require you to sacrifice some storage space, and you will have to download a new app.
You will have to download OBS, also known as open broadcasting software. This software has many uses and features, one of the most noticeable ones is streaming and recording your desktop computer. Moreover, it can also change your webcam settings.
First of all, you need to download the aforementioned software. You can download OBS by going to their website or clicking this. Once there, you can either download it for Mac, Windows, or Linux. Choose your platform; Now click on Download Installer, and it will automatically download. Now you can set it up as you would any app by double-clicking the setup file, and then it will do what it has to do.
- When you find that the app has been successfully installed.
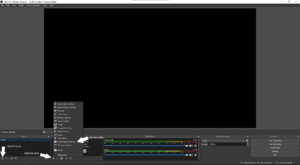
- Run the app; After you run the app, you will find yourself on the screen below.
- Go to the left-hand side and add a source in the Scene.
- Over there, add a video capture device. Again, a diagram is shown for ease.
From There:
- Click the OK button on the popup.
- Select your webcam in the device tab.
- Select Configure Video underneath the device tab.
- Here you can disable the automatic options and set your new settings.
- To change focus and exposure, go to the top right bar called Camera Control.
And there you go, you are done! Make sure to deselect the auto options on all the settings, or they will revert back to normal. You can find a preview on the app’s main screen, and you can tweak the settings that way. Finally, make sure to click apply, and then you are done.
If you have any questions, please do ask below, and if this helped you, then consider liking and following us as we post many helpful articles.
Common Problem with a fix!
Some people find a problem where the settings revert to normal every time they restart their computer or shut the app down; this has an easy fix: updating your drivers or reinstalling them. Thank you!


